A mysterious puddle under your kitchen sink or a surprising spray from a small fixture on your countertop can be unsettling. Often, the culprit is a leaking air gap faucet, a crucial component in many homes designed to protect your water supply. While it might seem like a minor annoyance, a leaking air gap signals a problem within your plumbing system that needs prompt attention. Understanding its purpose and how to address common issues is key to maintaining a clean, dry, and functional kitchen. This guide will walk you through everything you need to know, from identifying the leak’s source to implementing effective solutions and preventing future occurrences.
What is an Air Gap Faucet and Why Does it Leak?
An air gap faucet is a simple yet vital plumbing device, typically found on your kitchen countertop near the main faucet or integrated into an RO (Reverse Osmosis) system faucet. Its primary function is to prevent contaminated drain water from flowing back into your clean drinking water supply or dishwasher, a process known as backflow. This physical break in the plumbing line acts as a safeguard, ensuring that if there’s a sudden pressure drop or a clog in the drain, dirty water cannot be siphoned back into your appliance or potable water system.
Air gaps are essential for health and safety, often mandated by local plumbing codes to prevent water contamination. They are designed to allow air into the drain line, breaking any potential siphon effect. When an air gap leaks, it’s typically a warning sign that water cannot drain properly through the system, forcing it to exit through the air gap’s overflow port onto your countertop. This leakage is the air gap doing its job – diverting potentially contaminated water – but it indicates an underlying issue that requires troubleshooting.
Common Causes of Air Gap Leaks
Understanding the potential reasons behind an air gap leak is the first step toward a successful fix. Most leaks stem from blockages or improper installation, hindering the smooth flow of wastewater. Identifying the specific cause will guide you to the most effective solution.
Clogged Drain Lines
|
Our Picks for the Best Water Filter in 2026
As an Amazon Associate I earn from qualifying purchases.
|
||
| Num | Product | Action |
|---|---|---|
| 1 | E-3000UV Whole House Salt-Free Water Softener & Filter Combo with UV |

|
| 2 | Brita Metro Water Filter Pitcher with SmartLight Change Indicator, BPA-Free, Replaces 1,800 Plastic Water Bottles a Year, Lasts Two Months, Includes 1 Filter, Small - 6-Cup Capacity, White |
|
| 3 | Brita UltraMax Large Water Dispenser With Standard Filter, BPA-Free, Reduces Copper, Cadmium and Mercury Impurities, Lasts 2 Months or 40 Gallons, Includes 1 Filter, Kitchen Accessories, Large 27-Cup |
|
| 4 | ZeroWater 20-Cup Ready-Pour 5-Stage Water Filter Dispenser with 0 TDS Water Filter – IAPMO Certified to Reduce Lead, Chromium, and PFOA/PFOS |
|
| 5 | Samsung HAF-QIN/EXP Genuine Refrigerator Water Filter, Reduces 99% of Harmful Contaminants for Clean, Clear Drinking Water, 6-Month Life, Easy Install, Pack of 1 |
|
| 6 | everydrop by Whirlpool Ice and Water Refrigerator Filter 1, EDR1RXD1, Single-Pack , Purple |
|
| 7 | GLACIER FRESH Water Filter Compatible with XWFE (Built-in CHIP), Replacement for GE XWFE, XWF Refrigerator Water Filter NSF/ANSI 42 Certification Pack of 1 |
|
| 8 | ZeroWater 32-Cup 5-Stage Water Filter Dispenser with Instant Read Out - 0 TDS for Improved Tap Water Taste - IAPMO Certified to Reduce Lead, Chromium, and PFOA/PFOS |
|
| 9 | everydrop® by Whirlpool Refrigerator Water Filter A - EDRARXD1 (Pack of 1) |
|
| 10 | FRIGIDAIRE ULTRAWF Pure Source Ultra Water Filter, Original, White, 1 Count |
|
The most frequent cause of an air gap leak is a clog in the drain line, specifically the hose connecting the air gap to your garbage disposal or main sink drain. Over time, food particles, grease, soap scum, and other debris can accumulate in this hose, restricting the wastewater flow from your dishwasher or RO system. When the water can’t pass through fast enough, it backs up and exits through the air gap.
Clogged Garbage Disposal
If your dishwasher’s drain line connects to a garbage disposal, the disposal itself can be a source of the blockage. A common installation error for new disposals is neglecting to remove the knock-out plug inside the disposal’s dishwasher inlet port. If this plug remains, wastewater has nowhere to go but back up through the air gap. Even without this specific error, a heavily clogged or malfunctioning garbage disposal can impede drainage, leading to air gap overflow.
Kinked or Improperly Installed Hoses
The hoses connecting your air gap to your dishwasher or RO system and then to the drain must be properly installed. Any kinks, sharp bends, or loops in these hoses can restrict water flow, causing it to back up. Furthermore, if the drain line is excessively long or lacks a continuous downward slope, gravity may not be sufficient to pull the water through, resulting in a leak at the air gap.
Faulty Air Gap Unit
While less common than clogs, the air gap unit itself can sometimes be the source of the problem. For RO system air gap faucets, components like O-rings can wear out or become damaged, leading to leaks directly from the faucet body. Connections to the air gap may also loosen over time, allowing water to escape. In some cases, for RO systems, a missing or dislodged flow control can allow too much water into the air gap, overwhelming its capacity.
Improperly Mounted Air Gap
A loose or improperly sealed air gap can also lead to leaks around its base on the countertop. The nut underneath the counter that secures the air gap in place can become loose, or the sealant around the base can degrade. This allows water that overflows from the air gap to seep under the counter, potentially causing significant water damage to your cabinetry and subflooring. Always ensure the air gap is tightly secured and properly sealed to the countertop.
Diagnosing Your Air Gap Leak: A Step-by-Step Approach
When your air gap starts leaking, observing when and how it leaks provides crucial clues for diagnosis. Is it a constant drip, or does it only occur during specific appliance cycles? A systematic approach will help pinpoint the exact problem without unnecessary guesswork.
Start by noting the timing of the leak. Does water spill from the air gap only when your dishwasher is running, particularly during its drain cycle? Or does it happen when your reverse osmosis (RO) system is producing water and draining concentrate? This distinction helps determine whether the issue is related to the dishwasher’s drainage or the RO system’s wastewater output. A leak that appears during the dishwasher’s drain cycle strongly suggests a blockage in its discharge line or the garbage disposal. If it’s an RO system, the issue might be with its drain line, flow restrictor, or the air gap itself.
Next, perform a thorough visual inspection. Examine all hoses connected to the air gap, looking for obvious kinks, sharp bends, or damage. Check the connections at the air gap and where the hoses attach to the drain or garbage disposal for any looseness or signs of wear. Pay attention to the P-trap directly under the sink, as blockages there can also cause back pressure. You might also listen for unusual gurgling noises during the drainage cycle, which can indicate a partial clog trying to clear itself.
Troubleshooting Steps: Fixing the Leak
Once you have a good idea of what might be causing your air gap to leak, you can begin troubleshooting. Always prioritize safety by turning off the water supply or power to the relevant appliance before starting any work.
Safety First: Turn Off Water and Power
Before attempting any repairs, always ensure your safety. For dishwasher-related air gap leaks, it’s wise to turn off the power to the dishwasher at the circuit breaker. If the leak is from an RO system, locate and close the cold water supply valve to the RO unit, typically found under the sink. This prevents accidental water flow while you work and minimizes potential damage. Have towels and a bucket ready to catch any spills.
Check and Clear Clogs
Clogs are the most common culprits, so start here.
- Inside the Air Gap: Remove the air gap’s decorative cap and plastic cover on your countertop. Use a small brush, pipe cleaner, or even your finger to check for any visible debris inside the air gap unit itself. Clear any food particles, grease, or mineral buildup you find.
- Drain Hose: Disconnect the larger hose (usually the one going to the garbage disposal or sink drain) from the air gap unit. Place the end of the hose in a bucket and run a dishwasher cycle (if applicable) or flush water through it from the air gap side to see if water flows freely. If not, the hose is clogged. You can try to clear it by blowing through it, using a drain snake, or a long, flexible brush.
- Garbage Disposal: If the drain hose connects to a garbage disposal, ensure the disposal is clear. Run it with plenty of water. Crucially, if you recently installed a new disposal, verify that the knock-out plug for the dishwasher drain line has been removed. If it hasn’t, carefully tap it out with a hammer and screwdriver.
- P-trap and Main Drain: If the issue persists after clearing the air gap and hoses, the clog might be further down in your plumbing system, such as in the P-trap under the sink or the main drain line. You may need to disassemble the P-trap to clean it out or use a more robust drain clearing method for the main line.
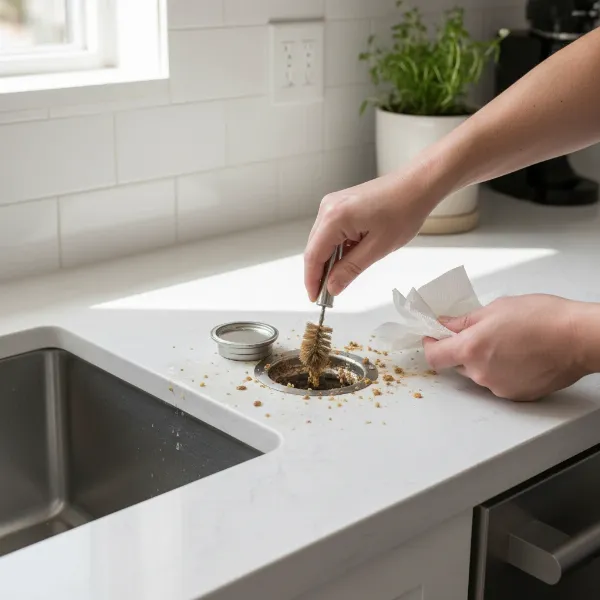 A person clearing a clog from a dishwasher air gap on a kitchen countertop with a small brush.
Inspect Hoses for Kinks and Proper Installation
Beyond clogs, hose issues can significantly impede drainage.
- Straighten Kinks: Visually trace the entire length of the drain hoses from the air gap to the disposal/drain. Straighten any kinks, loops, or sharp bends that could be restricting flow.
- Proper Slope and Length: Ensure the drain hose has a continuous downward slope to allow gravity to assist with drainage. If the hose is excessively long and sagging, it can create low points where water collects, causing backups. Trim the hose if possible to maintain a direct, sloped path to the drain.
- Saddle Connection Alignment: For some installations, the drain hose connects to the sink’s drain pipe via a saddle clamp. Ensure the hose and the hole drilled into the drain pipe are perfectly aligned. Misalignment can create a partial blockage. Re-align and tighten the clamp if necessary.
- Replace Damaged Hoses: Inspect hoses for any cracks, punctures, or signs of wear. Damaged hoses can lead to leaks anywhere along their length, not just at the air gap. Replace any compromised hoses.
Inspect Air Gap/Faucet for Integrity
Sometimes, the air gap unit itself or an integrated RO faucet is the problem.
- Tighten Connections and Mount: Check all connections to the air gap for looseness. Tighten any nuts or fittings under the sink that secure the air gap to the countertop or connect the hoses. Ensure the air gap body is tightly mounted to the countertop to prevent water from seeping underneath.
- Check and Replace O-rings: For RO air gap faucets, internal O-rings can degrade over time, leading to slow drips or leaks from the faucet neck. If you’re comfortable, disassemble the faucet handle and spout to access and replace worn O-rings. Ensure you use the correct size and type of O-rings.
- Verify Flow Control (RO Systems): If you have an RO system, check if a flow control or flow restrictor is correctly installed and not missing or dislodged. A missing flow control can allow too much water into the air gap, causing it to overflow.
- Consider Replacement: If the air gap unit or integrated RO faucet body is cracked, severely corroded, or if internal components are irreparably damaged, replacing the entire unit is often the best solution. Air gap replacements are generally straightforward and relatively inexpensive.
Preventing Future Air Gap Leaks
Proactive maintenance is key to avoiding frustrating air gap leaks and ensuring your plumbing system functions smoothly. A few simple habits can significantly extend the life of your air gap and prevent costly water damage.
Regular cleaning is paramount. Make it a routine to periodically remove the air gap’s cap and plastic cover. Visually inspect the inside for any accumulated food debris, grease, or mineral deposits. Use a small brush or a paper towel to wipe away any gunk you find. This simple step can prevent the gradual buildup that eventually leads to a blockage. Similarly, consider occasionally detaching the larger drain hose from the air gap and flushing it with hot water, especially if you notice slower drainage or hear gurgling sounds.
If your dishwasher drains through an air gap, proper dish preparation is crucial. Scrape food scraps and rinse heavily soiled dishes before loading them into the dishwasher. While modern dishwashers are efficient, excessive food particles entering the drain system can still contribute to clogs in the air gap hose or garbage disposal. Avoiding pouring grease down the drain is also vital, as it solidifies and clings to pipe walls, creating prime conditions for blockages.
Finally, proper installation and occasional checks are essential. Ensure that all hoses connected to the air gap maintain a continuous downward slope, are free of kinks or sharp bends, and are not excessively long. If you recently had a new garbage disposal installed, double-check that the knock-out plug for the dishwasher drain line was removed. Periodically verify that the air gap unit is securely mounted to your countertop and that its connections underneath the sink are tight. These simple preventative measures can save you a lot of trouble and expense down the line.
“A small leak from your air gap might seem minor, but it’s your plumbing system’s way of telling you there’s a blockage, preventing potential backflow and contamination. Don’t ignore it.” – John Laforme, Certified CREIA Inspector
Conclusion
A leaking air gap faucet, whether from your dishwasher or RO system, is more than just a nuisance—it’s a critical indicator that your plumbing’s backflow prevention is compromised. By understanding its purpose and diligently addressing potential issues like clogs, kinked hoses, or faulty components, you can swiftly diagnose and resolve the problem. Regular maintenance, such as routine cleaning and careful attention to proper installation, will significantly extend the lifespan of your air gap and keep your kitchen free from unexpected leaks. Taking proactive steps ensures that your home’s water remains clean and safe, protecting your health and preventing costly water damage. What measures will you take today to ensure your air gap faucet is functioning perfectly?
Frequently Asked Questions
What is the main purpose of a dishwasher air gap?
The primary purpose of a dishwasher air gap is to prevent dirty water from siphoning back into the dishwasher and contaminating your clean water supply. It creates a physical break in the drain line, which is essential for hygiene and safety.
How often should I clean my air gap to prevent leaks?
It’s recommended to visually inspect your air gap every few months, or immediately if you notice slow drainage or gurgling sounds. A thorough cleaning of any visible debris can be done once or twice a year, or as needed, to prevent blockages.
Can a dishwasher air gap be removed or bypassed?
While it might seem convenient, removing or bypassing an air gap is generally not recommended and is often against local plumbing codes. Its function is crucial for preventing backflow contamination, and tampering with it could lead to health risks and code violations.
Why does my air gap leak only when the dishwasher is running?
If your air gap leaks only during dishwasher operation, it almost certainly indicates a blockage in the drain line or garbage disposal that the dishwasher drains into. The volume of water from the dishwasher overwhelms the restricted drain path, causing water to overflow through the air gap.
What should I do if clearing clogs doesn’t stop the leak?
If clearing clogs and inspecting hoses doesn’t resolve the leak, the problem might be with the air gap unit itself. Check for loose connections, damaged O-rings (especially for RO faucets), or internal cracks. In such cases, replacing the entire air gap unit might be necessary.