For millions of households across the globe, private wells serve as a vital source of fresh drinking water. While offering independence, owning a well also comes with the significant responsibility of ensuring your water is safe from contaminants, particularly harmful bacteria like E. coli. Unlike municipal water systems, private wells are not subject to federal regulations or regular monitoring, placing the onus of water quality directly on the homeowner. Understanding how to properly test your well water for bacteria and E. coli is not just a recommendation—it’s a critical step in protecting your family’s health and peace of mind.
This comprehensive guide will walk you through everything you need to know about testing your well water. We’ll explore why testing is essential, what types of bacteria to look for, the different testing methods available, how to collect a proper sample, and crucially, what steps to take if contamination is found. By the end, you’ll be equipped with the knowledge to maintain a safe and healthy water supply for your home.
Understanding Well Water Contamination: Bacteria and Their Risks
Well water, though often perceived as pristine, is susceptible to various forms of contamination. Among the most concerning are bacterial contaminants, which can pose serious health risks. It’s impossible to detect these microscopic threats by taste, smell, or sight, making regular testing the only reliable defense.
What are Total Coliforms, Fecal Coliforms, and E. Coli?
When testing for bacterial contamination, laboratories typically look for specific indicator organisms:
- Total Coliform Bacteria: These are a group of bacteria commonly found in the environment, including soil, vegetation, and the intestinal tracts of warm-blooded animals. While most total coliforms are not harmful themselves, their presence in well water indicates a potential pathway for contaminants to enter your well system. This could signal a breach in the well’s integrity or an issue with the surrounding soil’s natural filtration.
- Fecal Coliform Bacteria: A subgroup of total coliforms, fecal coliforms are specifically found in the feces of warm-blooded animals. Their detection is a stronger indicator of recent fecal contamination than total coliforms alone.
- E. Coli (Escherichia coli): E. coli is a specific type of fecal coliform bacteria that lives in the intestines of humans and animals. Its presence in well water is a definitive sign of fecal contamination and should be taken very seriously. While many strains of E. coli are harmless, some can cause severe illnesses, including gastrointestinal distress, kidney failure, and even death, especially in vulnerable populations like infants, the elderly, and those with compromised immune systems. The U.S. Environmental Protection Agency (EPA) mandates that drinking water samples of 100mL must contain zero E. coli, setting a clear standard for safe consumption.
|
Our Picks for the Best Water Filter in 2026
As an Amazon Associate I earn from qualifying purchases.
|
||
| Num | Product | Action |
|---|---|---|
| 1 | everydrop® by Whirlpool Refrigerator Water Filter A - EDRARXD1 (Pack of 1) |

|
| 2 | Brita UltraMax Large Water Dispenser With Standard Filter, BPA-Free, Reduces Copper, Cadmium and Mercury Impurities, Lasts 2 Months or 40 Gallons, Includes 1 Filter, Kitchen Accessories, Large 27-Cup |
|
| 3 | GLACIER FRESH Water Filter Compatible with XWFE (Built-in CHIP), Replacement for GE XWFE, XWF Refrigerator Water Filter NSF/ANSI 42 Certification Pack of 1 |
|
| 4 | E-3000UV Whole House Salt-Free Water Softener & Filter Combo with UV |
|
| 5 | Samsung HAF-QIN/EXP Genuine Refrigerator Water Filter, Reduces 99% of Harmful Contaminants for Clean, Clear Drinking Water, 6-Month Life, Easy Install, Pack of 1 |
|
| 6 | everydrop by Whirlpool Ice and Water Refrigerator Filter 1, EDR1RXD1, Single-Pack , Purple |
|
| 7 | Brita Metro Water Filter Pitcher with SmartLight Change Indicator, BPA-Free, Replaces 1,800 Plastic Water Bottles a Year, Lasts Two Months, Includes 1 Filter, Small - 6-Cup Capacity, White |
|
| 8 | ZeroWater 32-Cup 5-Stage Water Filter Dispenser with Instant Read Out - 0 TDS for Improved Tap Water Taste - IAPMO Certified to Reduce Lead, Chromium, and PFOA/PFOS |
|
| 9 | ZeroWater 20-Cup Ready-Pour 5-Stage Water Filter Dispenser with 0 TDS Water Filter – IAPMO Certified to Reduce Lead, Chromium, and PFOA/PFOS |
|
| 10 | FRIGIDAIRE ULTRAWF Pure Source Ultra Water Filter, Original, White, 1 Count |
|
The Health Risks of Contaminated Well Water
Consuming water contaminated with harmful bacteria can lead to a range of health issues. Symptoms often mimic food poisoning and can include nausea, vomiting, diarrhea, abdominal cramps, and fever. In severe cases, particularly with pathogenic E. coli strains, the consequences can be life-threatening. Children, pregnant women, and individuals with weakened immune systems are especially vulnerable to these adverse health effects. Regular testing acts as an early warning system, preventing these potential illnesses before they escalate.
Methods for Testing Your Well Water for Bacteria
When it comes to testing your well water, you have two primary options: do-it-yourself (DIY) home test kits or professional laboratory testing. Each method offers distinct advantages and disadvantages regarding accuracy, cost, and comprehensiveness.
DIY Home Test Kits
Home test kits provide a convenient and immediate way to screen your well water. Many kits test for total coliforms and E. coli, often using a color-change reaction to indicate the presence of bacteria.
- Advantages:
- Convenience: Easily purchased online or at hardware stores.
- Speed: Results are typically available within 24-48 hours.
- Cost-effective: Generally less expensive than lab tests for initial screening.
- Disadvantages:
- Limited Accuracy: While useful for a general positive/negative indication, home kits may not detect all complex or low-level contaminants with the same precision as a lab.
- No Quantification: They usually don’t provide a quantitative measure of bacterial levels.
- Specificity: Some kits may not differentiate between harmless environmental coliforms and more dangerous fecal coliforms or E. coli effectively.
- False Positives/Negatives: Improper collection or kit limitations can lead to unreliable results.
It’s crucial to view DIY kits as a screening tool. If a home test indicates the presence of bacteria, or if you suspect contamination, a follow-up professional lab test is highly recommended for definitive results.
Professional Lab Testing
Professional lab testing offers the most accurate and reliable method for analyzing your well water. State-certified laboratories use sophisticated equipment and standardized methods to detect and quantify various bacteria, including total coliforms, fecal coliforms, and E. coli.
- Advantages:
- High Accuracy: Provides precise and quantitative results, identifying specific bacterial types and their concentrations.
- Comprehensive Analysis: Can test for a wide range of other contaminants beyond bacteria, such as nitrates, heavy metals, and volatile organic compounds (VOCs).
- Expert Interpretation: Labs often provide detailed reports and can offer guidance on understanding your results and recommended next steps.
- Accreditation: State-certified labs adhere to strict protocols, ensuring the reliability of their findings.
- Disadvantages:
- Cost: Generally more expensive than DIY kits.
- Time: Requires sending samples to a lab, so results may take several days to a week.
- Process: Involves careful sample collection following specific instructions to avoid contamination.
Comparing Well Water Testing Methods
| Feature | DIY Home Test Kits | Professional Lab Testing |
|---|---|---|
| Accuracy | General indication (presence/absence) | Highly accurate, quantitative, and specific |
| Cost | Lower | Higher |
| Convenience | High (immediate results at home) | Moderate (requires sample collection and shipping to lab) |
| Results Detail | Basic positive/negative | Detailed report, specific bacteria types, contaminant levels |
| Trustworthiness | Good for screening, but not definitive | Very high, often required for real estate transactions or health concerns |
| Expert Support | Limited to kit instructions | Often includes expert interpretation and recommendations |
How to Collect a Well Water Sample for Accurate Testing
Proper sample collection is paramount to ensure the accuracy of your well water test results. A contaminated sample can lead to false positives, causing unnecessary concern and expense. Always follow the specific instructions provided by your chosen lab or kit, but here are general guidelines:
- Contact a Certified Lab: The first step is to locate a state-certified laboratory in your area. Your local health department or environmental department can provide a list of accredited labs. Obtain a sterile sample kit directly from them, which will include bottles and detailed instructions. Do not use your own containers, as they may not be sterile.
- Choose the Right Faucet: Select a cold water tap that is regularly used for drinking and cooking, ideally one as close to the well as possible. Avoid faucets that are rarely used or those with leaky seals. Do not collect samples from a garden hose or a container like a water bottle.
- Prepare the Faucet:
- Remove any aerators, screens, or filters from the faucet spout.
- Wipe the inside and outside of the faucet with a chlorine solution (e.g., a mild bleach solution) or rubbing alcohol.
- Alternatively, you can sterilize the faucet using a small flame from a lighter (briefly, to avoid damage).
- Run the cold water on full blast for at least 3 to 5 minutes to flush out any stagnant water from the pipes. Then, reduce the flow to a steady trickle.
- Collect the Sample:
- Carefully open the sterile sample bottle, taking care not to touch the inside of the cap or the bottle itself. Hold the cap facing downwards to prevent airborne contaminants from entering.
- Fill the bottle directly from the faucet, leaving approximately one inch of air space at the top. This space is necessary for proper mixing during lab analysis.
- Cap the bottle immediately and securely, again without touching the inside surfaces.
- Handle and Transport:
- Fill out all necessary forms provided by the lab, including the date and time of collection.
- Keep the sample refrigerated (but do not freeze) and transport it to the laboratory as soon as possible, typically within 24 hours of collection. Collecting the sample early in the week (Monday to Thursday) ensures it reaches the lab for analysis within the critical timeframe.
- Crucially, do not collect treated water. If you have a water treatment device (like a water softener or reverse osmosis system), you must bypass, move, or disconnect it to collect an untreated raw water sample.
Ignoring these steps can lead to inaccurate results, potentially misdiagnosing a problem or missing genuine contamination.
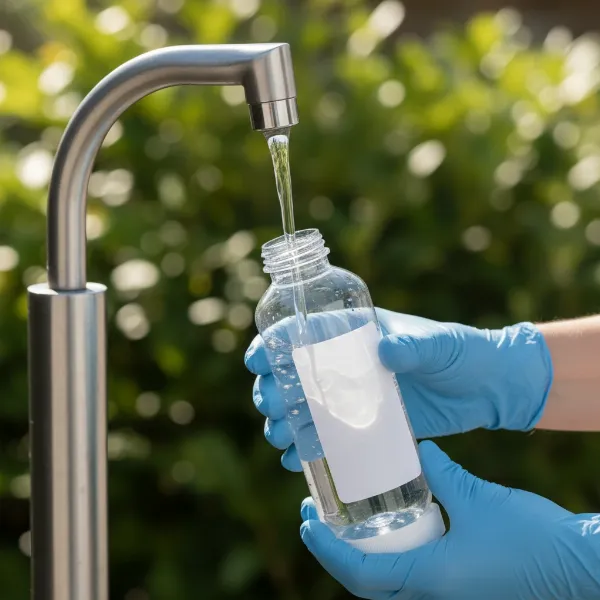 A gloved hand collecting well water in a sterile sample bottle from an outdoor faucet, emphasizing careful handling and proper technique
Understanding Your Well Water Test Results
Once your well water sample has been analyzed, you’ll receive a report detailing the findings. Interpreting these results correctly is essential for taking appropriate action.
What Do Positive and Negative Results Mean?
- Negative for Total Coliforms, Fecal Coliforms, and E. Coli: This is the ideal result, indicating that your water is microbiologically safe to drink at the time of testing. However, it’s important to remember that water quality can change, so annual testing remains vital.
- Positive for Total Coliforms (but Negative for Fecal Coliforms/E. Coli): This suggests that environmental bacteria have entered your well system. While these bacteria may not be immediately harmful, their presence indicates a potential pathway for more dangerous contaminants. It’s a warning sign that your well’s integrity may be compromised, and you should investigate potential entry points.
- Positive for Fecal Coliforms or E. Coli: This is a serious concern. It confirms that your well water has been contaminated with human or animal waste, posing an immediate health risk. Do not consume the water until the issue is resolved.
Actionable Steps Based on Your Results
If your test results indicate any level of bacterial contamination, immediate action is required:
- Positive Total Coliforms Only: Investigate your well system for potential issues such as a damaged well cap, cracks in the casing, or improper drainage around the wellhead. Address any identified problems and then retest your water. Consider increasing your testing frequency.
- Positive Fecal Coliforms or E. Coli:
- Stop Consumption: Immediately cease using the water for drinking, cooking, brushing teeth, making ice, or washing produce. Use an alternate safe source, such as bottled water, or boil your tap water for at least one minute before use.
- Notify Authorities: Contact your local health department or environmental agency to report the contamination. They can provide guidance on next steps and local resources.
- Retest to Confirm: It’s often recommended to conduct a resample to confirm the initial results. Follow strict collection protocols, potentially sampling from the original location and upstream/downstream points in your plumbing.
When and How Often Should You Test Your Well Water?
Regular well water testing is not a one-time event; it’s an ongoing commitment to your household’s health.
Recommended Testing Frequency
- Annually: As a minimum, test your well water at least once every year for total coliform bacteria, E. coli, nitrates, total dissolved solids, and pH levels. Many experts recommend testing each spring, after snowmelt and spring runoff, when wells are most vulnerable to contamination from surface water.
- New Well: Test your water immediately after a new well is installed and again after any new plumbing is put in.
- After Repairs or Maintenance: Any work done on your well system, such as pump replacement, casing repair, or modifications, should be followed by a bacterial test.
- Changes in Water Quality: If you notice any changes in your water’s taste, odor, clarity, or color, or if there’s a sudden onset of gastrointestinal illness among household members, test your water immediately.
- Environmental Events: After heavy rainfall, flooding, or nearby land disturbances (e.g., construction, agricultural runoff), test your well water for potential contamination.
- Specific Concerns: Consult your local health department to learn about other specific contaminants prevalent in your region, such as arsenic, radon, or pesticides, and test for those as recommended.
What to Do If E. Coli or Bacteria is Found in Your Well Water
Discovering E. coli or other harmful bacteria in your well water can be alarming, but immediate and decisive action can resolve the issue.
Immediate Actions
- Stop Drinking and Cooking with the Water: This is the most critical first step. Use bottled water for all consumption, food preparation, brushing teeth, and making ice. You can also boil tap water vigorously for at least one minute to kill most harmful bacteria.
- Notify All Water Users: Inform everyone in your household and any other individuals who use your well water about the contamination. Post clear warning notices.
- Contact Your Local Health Department: Report the positive test result. They can offer specific advice, help interpret results, and guide you through the remediation process.
- Avoid Water-Intensive Activities: If possible, limit bathing, showering, and dishwashing until the contamination source is identified and treated. If you must use water, be cautious to avoid ingestion.
Treatment Options for Contaminated Wells
Once contamination is confirmed, several treatment options are available. The best approach depends on the source and severity of the contamination.
- Shock Chlorination: This is the most common immediate treatment for bacterial contamination. It involves introducing a strong chlorine solution (typically household bleach) directly into the well and circulating it throughout your plumbing system.
- Process: Remove any filters or aerators, calculate the required amount of chlorine based on your well’s depth and diameter, pour the chlorine into the well, and circulate it by running water from each faucet until a chlorine smell is detected. Allow the chlorinated water to sit in the system for at least 12-24 hours without using the well.
- Flushing: After the contact time, flush the entire system by running outdoor faucets or hoses until the chlorine smell dissipates.
- Retesting: After flushing, wait several days and then retest your water to confirm the chlorine has successfully eliminated the bacteria. You may need to repeat shock chlorination if the initial attempt is unsuccessful.
- Always follow detailed instructions from your local health department or a well professional when performing shock chlorination to ensure safety and effectiveness.
- Permanent Disinfection Systems: For recurring bacterial contamination or a persistent contamination source, installing a permanent water treatment system is often necessary.
- Ultraviolet (UV) Light Systems: UV systems use germicidal UV light to inactivate bacteria, viruses, and other microorganisms as water passes through. They are highly effective, chemical-free, and do not alter the water’s taste or odor.
- Chlorine Injection Systems: These systems continuously inject a small, controlled amount of chlorine into your well water, providing ongoing disinfection.
- Reverse Osmosis (RO) Systems: While primarily used for drinking water at the tap, RO systems can remove bacteria along with a wide range of other contaminants. They are typically installed at a single point-of-use rather than for the entire home.
Addressing the Source of Contamination
Killing existing bacteria is only part of the solution; it’s equally important to identify and address the source of contamination to prevent future occurrences.
- Well Integrity Inspection: Have a licensed well professional inspect your well structure, including the well cap, casing, and seals, for any cracks, damage, or improper construction that could allow surface water or contaminants to enter.
- Septic System Inspection: If you have a septic system, ensure it is properly maintained, regularly pumped, and located at a safe distance from your well (typically at least 50 feet for the tank and 100 feet for the drain field).
- Runoff Management: Divert surface water runoff away from your wellhead. Maintain the area around your well, keeping it clear of debris, animal waste, fertilizers, and pesticides.
- Animal Intrusion: Ensure the wellhead is properly sealed to prevent animals or insects from entering.
- Groundwater Contamination: In some cases, widespread groundwater contamination may require a deeper well or connecting to a municipal water supply if available.
“Proactive well maintenance and regular testing are your best defense against unexpected contamination. Don’t wait for symptoms; test annually.” – John Smith, Certified Well Water Specialist
Tips for Maintaining a Healthy Well
Preventative measures are key to ensuring the long-term safety of your well water.
- Annual Well Inspection: Beyond water testing, visually inspect your wellhead annually. Look for any signs of damage, corrosion, missing caps, or inadequate seals.
- Maintain Proper Drainage: Ensure that the ground around your well slopes away from it to prevent pooling water and runoff from infiltrating the well.
- Keep the Well Area Clear: Avoid storing chemicals, fertilizers, or animal waste near your well. Keep vegetation trimmed around the wellhead.
- Protect from Flooding: If your well is in a flood-prone area, consider extending the well casing above potential flood levels.
- Proper Septic System Care: If you have a septic system, maintain it properly and have it pumped as needed to prevent leaks and overflows that could contaminate groundwater.
- Record Keeping: Keep a record of all your well test results and maintenance activities. This can help you track water quality trends and identify potential issues early.
Conclusion
Ensuring the safety of your private well water is a critical responsibility that directly impacts the health of your household. While your well provides a valuable natural resource, it also demands vigilant attention to protect against bacterial invaders like E. coli. Regular testing, adherence to proper sampling techniques, and decisive action when contamination is detected are the cornerstones of responsible well ownership. By embracing annual testing and understanding the simple yet powerful steps to take in response to results, you not only safeguard your family’s health but also contribute to the longevity and reliability of your well system.
Are you confident in the purity of your drinking water? Make well water testing a priority this year.
Frequently Asked Questions
How often should I test my well water for bacteria and E. coli?
You should test your well water for total coliform bacteria and E. coli at least once a year, typically in the spring. It is also crucial to test after any well repairs, changes in water quality, or environmental events like floods or heavy rainfall.
Can I rely solely on home test kits for E. coli in well water?
Home test kits can provide a quick screening for the presence of bacteria, but they generally offer limited accuracy and do not quantify the level of contamination. For definitive results and to understand the specific types of bacteria present, professional laboratory testing is strongly recommended.
What should I do immediately if my well water tests positive for E. coli?
If your well water tests positive for E. coli, immediately stop using the water for drinking, cooking, and brushing teeth. Use bottled water or boil your tap water for at least one minute. Contact your local health department for guidance and arrange for retesting and potential well disinfection, such as shock chlorination.
What is shock chlorination and how does it work?
Shock chlorination is a common method to disinfect a contaminated well. It involves adding a concentrated chlorine solution (like household bleach) to the well and circulating it throughout the plumbing system. The chlorine kills bacteria and other microorganisms. After a specific contact time, the chlorinated water is flushed out, and the well is retested to confirm effective disinfection.
How can I prevent bacterial contamination in my well water?
Preventative measures include annual well inspections, maintaining a secure and properly sealed well cap and casing, ensuring proper drainage away from the wellhead, keeping the area around your well clear of potential contaminants (like animal waste or chemicals), and properly maintaining any nearby septic systems.