A well-maintained water softener is the silent hero behind your home’s soft water, protecting your pipes, appliances, and even your skin and hair from the harsh effects of hard water minerals. But like any vital home appliance, it requires consistent care to operate at its peak. Neglecting your water softener can lead to reduced efficiency, costly repairs, and a frustrating return of hard water symptoms. Understanding the simple yet crucial maintenance tasks, from managing salt levels to performing thorough cleanings, ensures your system continues to deliver the benefits you rely on.
Understanding Your Water Softener: Why Maintenance is Key
A water softener works through an ion exchange process, using resin beads to capture hard minerals like calcium and magnesium from your water and releasing sodium ions in their place. This process is essential for preventing limescale buildup, extending the life of your water-using appliances, and improving the effectiveness of soaps and detergents. However, over time, various issues can arise if your system isn’t properly maintained. Salt impurities can accumulate, resin beads can become fouled, and crucial components can get clogged. Regular maintenance is not just about fixing problems; it’s about preventing them, ensuring consistent soft water, and maximizing your investment in a healthy home environment.
Choosing the Right Salt for Your Water Softener System
The type of salt you use significantly impacts your water softener’s performance and longevity. Not all salts are created equal, and selecting the correct one can minimize maintenance headaches.
- Rock Salt: This is the least processed and typically the most affordable option. Mined from underground deposits, it appears as large, coarse crystals. However, it contains more impurities, such as calcium sulfate, which can lead to residue buildup and more frequent cleaning of your brine tank. It’s generally suitable for areas with moderate water hardness.
- Solar Salt: Produced by evaporating seawater with sunlight, solar salt is purer than rock salt, often reaching 99.5% sodium chloride content. It’s available in crystal or pellet forms and is more soluble, leaving less residue. This makes it a popular choice, offering a good balance between purity and cost.
- Evaporated Salt: Considered the purest form of water softener salt (up to 99.9% pure), evaporated salt is created by heating saltwater to remove moisture. It dissolves quickly, minimizing tank residue and salt bridge formation. While typically the most expensive, its high purity makes it ideal for systems requiring low maintenance and for areas with extremely hard water. It’s usually sold in pellet form.
- Potassium Chloride: For those looking to reduce sodium intake or environmental impact, potassium chloride is a salt alternative. It works effectively as an ion exchange agent but is generally more expensive and you may need a greater volume to achieve the same softening effect as sodium chloride.
- Specialty Salts: Some salts come with added ingredients, such as iron reducers, which can be beneficial if your water has high iron content, helping to prevent rust stains and further extending the life of your resin beads.
When choosing salt, always consult your water softener’s manufacturer recommendations. Consider your water hardness levels, preferred maintenance frequency, any health considerations (like low-sodium diets), and environmental concerns. Using the wrong type of salt can lead to reduced efficiency, salt issues, and even damage to your system over time.
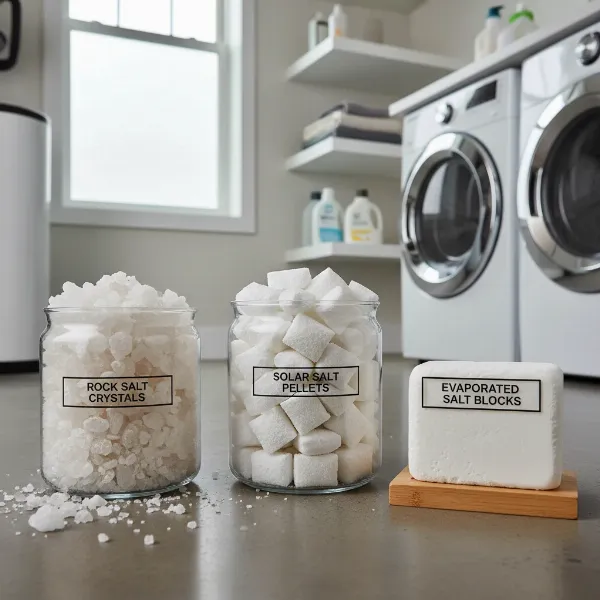 Various types of water softener salt including rock, solar, and evaporated pellets for home use
Keeping Salt Levels Optimal and Tackling Salt Issues
Maintaining the correct salt level in your brine tank is perhaps the most fundamental aspect of water softener care. It directly impacts the system’s ability to regenerate its resin beads and provide soft water.
Checking and Refilling Salt Levels
|
Our Picks for the Best Water Filter in 2026
As an Amazon Associate I earn from qualifying purchases.
|
||
| Num | Product | Action |
|---|---|---|
| 1 | Brita UltraMax Large Water Dispenser With Standard Filter, BPA-Free, Reduces Copper, Cadmium and Mercury Impurities, Lasts 2 Months or 40 Gallons, Includes 1 Filter, Kitchen Accessories, Large 27-Cup |

|
| 2 | E-3000UV Whole House Salt-Free Water Softener & Filter Combo with UV |
|
| 3 | GLACIER FRESH Water Filter Compatible with XWFE (Built-in CHIP), Replacement for GE XWFE, XWF Refrigerator Water Filter NSF/ANSI 42 Certification Pack of 1 |
|
| 4 | ZeroWater 20-Cup Ready-Pour 5-Stage Water Filter Dispenser with 0 TDS Water Filter – IAPMO Certified to Reduce Lead, Chromium, and PFOA/PFOS |
|
| 5 | Brita Metro Water Filter Pitcher with SmartLight Change Indicator, BPA-Free, Replaces 1,800 Plastic Water Bottles a Year, Lasts Two Months, Includes 1 Filter, Small - 6-Cup Capacity, White |
|
| 6 | ZeroWater 32-Cup 5-Stage Water Filter Dispenser with Instant Read Out - 0 TDS for Improved Tap Water Taste - IAPMO Certified to Reduce Lead, Chromium, and PFOA/PFOS |
|
| 7 | FRIGIDAIRE ULTRAWF Pure Source Ultra Water Filter, Original, White, 1 Count |
|
| 8 | everydrop by Whirlpool Ice and Water Refrigerator Filter 1, EDR1RXD1, Single-Pack , Purple |
|
| 9 | everydrop® by Whirlpool Refrigerator Water Filter A - EDRARXD1 (Pack of 1) |
|
| 10 | Samsung HAF-QIN/EXP Genuine Refrigerator Water Filter, Reduces 99% of Harmful Contaminants for Clean, Clear Drinking Water, 6-Month Life, Easy Install, Pack of 1 |
|
You should check the salt level in your brine tank at least once a month. Ideally, the tank should be kept about one-half to three-quarters full, or at a level that keeps the salt consistently above the water line. Never overfill the tank, as this can exacerbate salt-related problems. Most households will need to replenish their salt every two to four months, but this can vary based on your water hardness, water usage, and the efficiency of your specific softener model. Regular checks help you anticipate refills and prevent the system from running out of salt, which would temporarily halt the softening process.
Understanding and Breaking Up Salt Bridges
A salt bridge forms when the salt in your brine tank solidifies into a hard crust, creating an empty space between the salt and the water below. This prevents the salt from dissolving properly to create the brine solution needed for regeneration.
You might suspect a salt bridge if your water suddenly feels hard despite the tank appearing full of salt, or if the salt level doesn’t seem to drop over time. To resolve this, gently poke the salt with a long-handled tool, like a broom handle, to break up the crust. If the bridge is particularly stubborn, pouring a small amount of hot water over it can help loosen the hardened salt.
Clearing Salt Mushing
Salt mushing occurs when dissolved salt reforms as a slushy, compacted layer at the bottom of the brine tank. This sludge can prevent the water from properly interacting with the salt, leading to inefficient regeneration. If you encounter salt mushing, simply breaking it up might not be enough. You’ll need to remove all the salt from the tank, scoop out the mush, thoroughly clean the brine tank, and then refill it with fresh, appropriate salt. Addressing these salt issues promptly ensures your water softener consistently provides soft water and prevents unnecessary strain on the system.
 A clear illustration of a salt bridge forming inside a water softener brine tank, with a long-handled tool breaking it up
Comprehensive Cleaning Guide for Your Water Softener
Beyond managing salt, periodic cleaning of key components is essential for your water softener’s long-term health and efficiency.
Brine Tank Cleaning
The brine tank, despite holding salt, can accumulate impurities and sediment over time, leading to reduced efficiency or even bacterial growth. Cleaning your brine tank annually is a good practice, especially for older models, or every five to ten years for modern systems. However, if you notice discolored water, unusual odors, or salt mushing, it’s time for a cleaning regardless of the schedule.
Here’s how to clean your brine tank:
- Bypass and Disconnect: Turn off the water supply to your softener and engage the bypass valve to ensure water can still flow to your home. Unplug the unit.
- Remove Components and Salt: Carefully remove the brine well and any other internal components, such as the salt grid or mesh filter. Scoop out all remaining salt and drain any water from the tank into a sink or a suitable outdoor area where salty water won’t harm plants.
- Clean the Tank: Prepare a cleaning solution. You can mix a couple of tablespoons of dish soap with warm water, or for a deeper sanitization, use a solution of ¼ cup of bleach to 1-3 gallons of water (always check your manufacturer’s manual for bleach compatibility). Using a stiff-bristle brush, thoroughly scrub the inside of the tank, paying close attention to the bottom and corners where residue often collects.
- Rinse and Dry: Rinse the tank thoroughly with clean water, ensuring all soap or bleach residue is removed. Allow the tank and its components to dry completely before reassembly.
- Reassemble and Refill: Once dry, reassemble all components, reconnect the brine tank, and refill it with the recommended type and amount of fresh water softener salt. Take the system out of bypass mode and plug it back in.
Resin Bed Cleaning
The resin beads are the workhorses of your water softener, and while they regenerate with salt, they can become fouled by iron, silt, or other organic compounds over time. Cleaning your resin bed every three to four months can restore their efficiency and extend their lifespan. You can purchase a liquid water softener cleaner, often formulated to remove iron, from your local hardware store. Simply pour the recommended amount into the brine tank (following the product’s instructions) and then initiate a manual regeneration cycle to flush out the cleaner and impurities.
Venturi Valve Cleaning
The Venturi valve, typically located on the control head of your water softener, creates the suction needed to draw brine from the salt tank into the resin tank during regeneration. If this valve becomes clogged with sediment, your softener won’t function correctly. It’s advisable to clean the Venturi valve every six months to annually.
To clean it:
- Bypass and Unplug: Turn off the water supply and unplug your softener.
- Access the Valve: Locate the Venturi valve (refer to your owner’s manual if needed). It usually has an easily removable cover.
- Disassemble and Clean: Unscrew the valve cover and carefully remove the internal parts, including the nozzle and screen. Wash all components thoroughly in soapy water, using a small brush to remove any sediment or debris.
- Reassemble: Reassemble the valve, ensuring all parts are correctly seated, and secure the cover. Take the system out of bypass and plug it back in.
 A person scrubbing the inside of an empty water softener brine tank with a brush and cleaning solution
Advanced Maintenance and Professional Care
While many maintenance tasks are DIY-friendly, there are other considerations to keep your system running smoothly.
Adjusting Settings for Water Usage
If your household’s water usage significantly changes (e.g., more people move in, or fewer are at home), you may need to adjust the settings on your water softener. Most modern softeners allow you to modify regeneration frequency or salt dose to match your new consumption patterns, ensuring optimal efficiency and salt usage.
Inspecting Bypass and Other Valves
Periodically, it’s a good idea to check the bypass, intake, and outtake valves, ideally once a month. Simply open and close them to ensure they operate freely and aren’t seized or leaking due to rust or wear. This simple action can help prevent future leaks and ensure you can bypass your system in an emergency.
When to Consider Professional Servicing
Even with diligent homeowner maintenance, scheduling a professional inspection every few years is highly recommended. A certified technician can perform deeper diagnostics, check for wear on internal components, calibrate settings, and address any complex issues that might be beyond a typical homeowner’s scope. This is particularly important for older systems or if you suspect a problem you can’t identify.
Maintaining your water softener isn’t just about prolonging its life; it’s about ensuring your home consistently receives the benefits of soft water. From regular salt checks to periodic deep cleanings of the brine tank, resin bed, and Venturi valve, each step plays a vital role. By following these essential maintenance tips, you protect your investment, prevent inconvenient hard water issues, and keep your system running efficiently for years to come. Don’t let your water softener become the forgotten workhorse – give it the care it deserves!
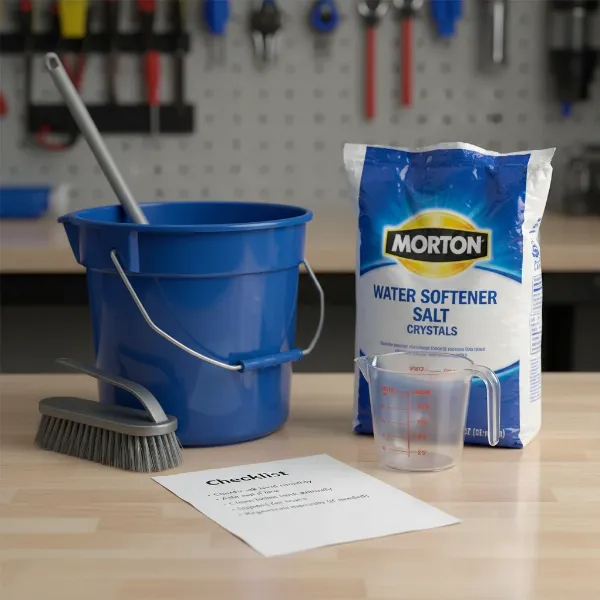 A visual checklist and tools for water softener maintenance tasks like checking salt levels and cleaning
Frequently Asked Questions
How often should I add salt to my water softener?
You should check your salt levels monthly and typically refill your brine tank every two to four months, or when the salt level drops below one-quarter full, ensuring it remains above the water line.
What happens if my water softener runs out of salt?
If your water softener runs out of salt, it cannot complete the regeneration cycle, meaning the resin beads won’t be recharged. This will result in your system producing hard water until the salt is replenished and a new regeneration cycle runs.
Can I use any type of salt in my water softener?
No, it’s crucial to use salt specifically designed for water softeners. Types like rock salt, solar salt, or evaporated salt pellets are common, but you should always consult your manufacturer’s manual for specific recommendations to avoid damage or reduced efficiency.
How often should the brine tank be cleaned?
While some modern units can go five to ten years between deep cleanings, it’s generally recommended to clean your brine tank annually to prevent sediment buildup, salt mushing, and ensure optimal performance.