Is your trusty water dispenser starting to look a little cloudy, or worse, sporting unsightly white, chalky residue around the spouts and inside the reservoir? You’re likely dealing with mineral buildup, a common issue that affects nearly all water-contacting appliances. This guide will walk you through everything you need to know about cleaning mineral buildup on your water dispenser, ensuring your family continues to enjoy fresh, clean, and great-tasting water.
A clean water dispenser isn’t just about aesthetics; it’s fundamental to your health and the longevity of your appliance. Over time, hard water deposits, primarily calcium and magnesium, can accumulate, not only impacting water flow and taste but also creating an environment where bacteria and mold can thrive. Regular descaling is a simple yet vital task that prolongs your dispenser’s life and guarantees pure hydration.
Understanding Mineral Buildup: Why It Happens and Why It Matters
Mineral buildup, often referred to as limescale or hard water stains, is the white, crusty residue you see on surfaces that frequently come into contact with water. This phenomenon occurs when water, rich in dissolved minerals like calcium and magnesium, evaporates, leaving these solid mineral particles behind. Over time, these particles accumulate, forming a visible layer.
Ignoring mineral buildup in your water dispenser can lead to several problems. Firstly, it can significantly alter the taste and smell of your drinking water, making it unpleasant. Secondly, these deposits can clog internal components, reducing water flow and putting extra strain on the dispenser’s mechanics, potentially shortening its lifespan. Most importantly, mineral buildup creates rough surfaces where bacteria, algae, and mold can easily attach and grow, posing a health risk by contaminating your drinking water. Keeping your dispenser descaled ensures optimal performance and hygiene.
 Close-up of a water dispenser spout covered in white, chalky mineral buildup.
Types of Water Dispensers and Their Cleaning Nuances
Water dispensers come in various forms, each serving the same basic purpose but with slightly different designs that influence their cleaning approach. Understanding your dispenser type is the first step toward effective cleaning and descaling.
- Bottled Water Dispensers: These are perhaps the most common, featuring a large water bottle inverted on top or stored in a compartment below. Top-loading models dispense water via gravity, while bottom-loading units use a pump. Both types have an internal reservoir that needs regular cleaning.
- Point-of-Use (POU) Water Dispensers: Connected directly to your home’s water line, these dispensers typically include built-in filtration systems. While they eliminate the need for heavy bottles, their internal lines and filters still require attention for mineral buildup.
- Refrigerator Water Dispensers: Integrated into refrigerators, these models often share a water line with the ice maker. Mineral buildup here can affect both water dispensing and ice quality, requiring specific cleaning for the internal tubing and external components.
- Countertop and Freestanding Models: These categories can include both bottled and POU systems, varying mainly in their size and placement. The core cleaning principles remain similar, focusing on the reservoir, spouts, and drip tray.
Regardless of the type, the goal is always to prevent and remove mineral deposits to maintain water quality and appliance efficiency. Always consult your manufacturer’s manual for specific instructions unique to your model.
Essential Tools and Cleaning Agents for Descaling
Before you begin the cleaning process, gather your supplies. Having everything at hand will make the task smoother and more efficient. For tackling stubborn mineral buildup, specific cleaning agents are highly effective.
Cleaning Products:
- Distilled White Vinegar: This is your primary weapon against limescale. Its acetic acid naturally breaks down mineral deposits. It’s safe, non-toxic, and readily available.
- Mild Dish Soap: Ideal for cleaning exterior surfaces, drip trays, and removable parts.
- Chlorine Bleach (Optional, for Sanitization): While vinegar handles mineral buildup, a diluted bleach solution can be used for sanitizing and killing bacteria or mold. Never mix bleach and vinegar, as this creates a toxic gas.
Cleaning Supplies:
- Large Bucket or Pitcher: For draining water and preparing cleaning solutions.
- Soft-Bristled Brush (Long-handled): Essential for scrubbing the interior of the reservoir and hard-to-reach areas. An old toothbrush can work for small crevices and spouts.
- Clean Sponges or Microfiber Cloths: For wiping down surfaces and applying solutions.
- Rubber Gloves: To protect your hands, especially when using bleach or for extended cleaning.
- Small Funnel: Useful for directing cleaning solutions into narrow tubes (e.g., in refrigerator dispensers).
- Eye Protection (Optional but Recommended): For protecting your eyes from splashes, particularly when using bleach.
With these tools, you’re well-equipped to restore your water dispenser to its pristine, mineral-free state.
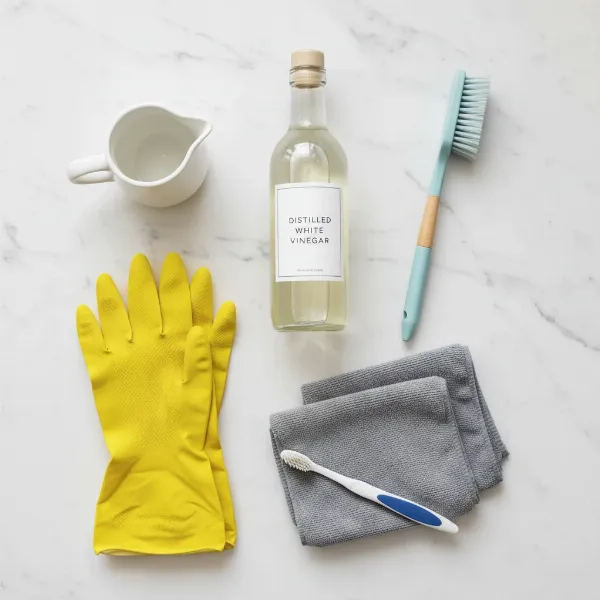 Various cleaning tools and agents like vinegar, brushes, and cloths for water dispenser descaling.
Step-by-Step Guide: How to Deep Clean Your Water Dispenser
A thorough cleaning routine for your water dispenser involves several key steps, designed to dismantle, descale, sanitize, and rinse every critical component. Following these instructions will ensure that you effectively remove mineral buildup and maintain hygienic operation.
Step 1: Prepare for Cleaning and Ensure Safety
|
Our Picks for the Best Water Filter in 2026
As an Amazon Associate I earn from qualifying purchases.
|
||
| Num | Product | Action |
|---|---|---|
| 1 | everydrop by Whirlpool Ice and Water Refrigerator Filter 1, EDR1RXD1, Single-Pack , Purple |

|
| 2 | FRIGIDAIRE ULTRAWF Pure Source Ultra Water Filter, Original, White, 1 Count |
|
| 3 | GLACIER FRESH Water Filter Compatible with XWFE (Built-in CHIP), Replacement for GE XWFE, XWF Refrigerator Water Filter NSF/ANSI 42 Certification Pack of 1 |
|
| 4 | ZeroWater 20-Cup Ready-Pour 5-Stage Water Filter Dispenser with 0 TDS Water Filter – IAPMO Certified to Reduce Lead, Chromium, and PFOA/PFOS |
|
| 5 | everydrop® by Whirlpool Refrigerator Water Filter A - EDRARXD1 (Pack of 1) |
|
| 6 | Brita Metro Water Filter Pitcher with SmartLight Change Indicator, BPA-Free, Replaces 1,800 Plastic Water Bottles a Year, Lasts Two Months, Includes 1 Filter, Small - 6-Cup Capacity, White |
|
| 7 | ZeroWater 32-Cup 5-Stage Water Filter Dispenser with Instant Read Out - 0 TDS for Improved Tap Water Taste - IAPMO Certified to Reduce Lead, Chromium, and PFOA/PFOS |
|
| 8 | Brita UltraMax Large Water Dispenser With Standard Filter, BPA-Free, Reduces Copper, Cadmium and Mercury Impurities, Lasts 2 Months or 40 Gallons, Includes 1 Filter, Kitchen Accessories, Large 27-Cup |
|
| 9 | E-3000UV Whole House Salt-Free Water Softener & Filter Combo with UV |
|
| 10 | Samsung HAF-QIN/EXP Genuine Refrigerator Water Filter, Reduces 99% of Harmful Contaminants for Clean, Clear Drinking Water, 6-Month Life, Easy Install, Pack of 1 |
|
Safety first! Before you touch anything, always unplug your water dispenser from the electrical outlet. If your dispenser has a heating element, turn off the hot water switch. For POU dispensers, turn off the water supply valve connected to your home’s water line. Next, remove the water bottle (if applicable) and drain any remaining water from both the hot and cold taps into a bucket or large pitcher until the reservoir is empty.
Step 2: Disassemble and Clean Removable Parts
Most water dispensers have removable components such as the drip tray, spouts, and a water guard or baffle inside the reservoir. Carefully detach these parts. Take them to your sink and wash them thoroughly with warm water and mild dish soap. For stubborn mineral buildup on the drip tray or spouts, soak them in a solution of equal parts white vinegar and water for about 10-15 minutes before scrubbing. Use a small brush (like an old toothbrush) to clean inside the spouts and any small crevices. Rinse all parts completely and set them aside to air dry.
Step 3: Tackle Interior Mineral Buildup (Descaling the Reservoir)
This is the core step for removing limescale.
- For Bottled/POU Dispensers: Fill the water reservoir with a descaling solution. A common and effective choice is a mixture of equal parts distilled white vinegar and water. Alternatively, some recommend a 1:3 ratio of vinegar to water for less severe buildup, or a tablespoon of bleach per gallon of water for sanitization (do not mix vinegar and bleach). Pour 2-3 cups of your chosen solution directly into the reservoir.
- For Refrigerator Dispensers: If possible, disconnect the water line at the back of the fridge. Place a small funnel into the copper tubing and carefully pour 2 to 3 cups of plain white vinegar into it to flow into the reservoir.
Allow the solution to sit in the reservoir for at least 10 minutes, or longer (up to 30 minutes for heavy buildup), to allow the acid to break down the minerals. Use a long-handled, soft-bristled brush or sponge to gently scrub the interior walls and bottom of the reservoir, dislodging any loosened deposits.
Step 4: Flush the Internal System Thoroughly
After the descaling solution has worked its magic and you’ve scrubbed the interior, it’s crucial to drain and rinse the system thoroughly.
- Dispense the cleaning solution through both the hot and cold taps into your bucket until the reservoir is empty. Dispose of the solution safely down a sink or toilet.
- Refill the reservoir with clean, fresh water. Dispense this water through the taps until the reservoir is empty again. Repeat this rinsing process at least two to three times, or until there is no residual smell or taste of vinegar or bleach. This step is critical to ensure no cleaning agents are left in your drinking water.
Step 5: Clean the Exterior Surfaces
While the interior is drying, take a clean microfiber cloth or sponge dampened with a mild dish soap solution or a diluted vinegar solution (1 part vinegar to 3 parts water) and wipe down all external surfaces of the dispenser. Pay close attention to the dispensing levers, buttons, and any areas frequently touched. For stainless steel finishes, use a specialized stainless steel cleaner to avoid streaks. Make sure to clean the air vents on the back of the cooler using a vacuum attachment or a disposable duster, as dust accumulation can hinder cooling efficiency.
Step 6: Reassemble and Reconnect
Once all parts are completely dry, reassemble your water dispenser. Reinstall the water guard, spouts, and drip tray. For bottled dispensers, place a fresh water bottle securely in position. For POU models, reconnect the water supply. Finally, plug the dispenser back into the electrical outlet and turn on the hot water switch if you had it off. Dispense a full cup of fresh water from both taps and discard it to ensure the system is completely flushed and ready for use.
By following these detailed steps, your water dispenser will be free of mineral buildup, sanitized, and ready to provide you with refreshing, clean water.
Maintaining Your Water Dispenser: Tips for Longevity and Purity
Regular maintenance is key to preventing future mineral buildup and ensuring your water dispenser remains a reliable source of clean water. Integrating a few simple habits into your routine can significantly extend its lifespan and maintain optimal hygiene.
- Routine Cleaning Schedule: Aim for a deep clean every three to six months, depending on your water hardness and usage frequency. However, daily or weekly attention to high-contact areas and the drip tray is advisable.
- Wipe Down Regularly: Make it a habit to wipe the dispensing levers, spouts, and the surrounding exterior with a clean, damp cloth or a mild disinfectant wipe daily. This helps to remove fingerprints, dust, and minor splatters before they become permanent stains or breeding grounds for germs.
- Empty and Clean the Drip Tray Often: The drip tray is a magnet for moisture and mineral accumulation. Empty and wash it with soap and water at least once a week. For areas with hard water, a quick soak in vinegar can prevent hard water spots.
- Use Filtered Water: If your dispenser accommodates it, using filtered water can significantly reduce the amount of minerals introduced into the system, thus slowing down the rate of buildup. For bottled dispensers, ensure the water bottles themselves are clean before installation.
- Clean Bottle Neck Before Loading: Before placing a new water bottle onto a top-loading dispenser, quickly wipe down the neck and shoulder of the bottle with a clean cloth. This prevents dust and external contaminants from entering the reservoir.
By adopting these maintenance tips, you can drastically reduce the effort required for deep cleaning and keep your water dispenser operating at its best, providing pure water with every dispense.
Eco-Friendly Alternatives for Descaling
For those who prefer to minimize chemical use, several natural and eco-friendly options can effectively tackle mineral buildup in your water dispenser. These alternatives are gentle on your appliance and safer for the environment.
- Baking Soda: A mild abrasive, baking soda can be mixed with a small amount of water to form a paste. This paste is excellent for scrubbing external surfaces, spouts, and the drip tray to remove light mineral deposits and neutralize odors without harsh chemicals. It’s gentle enough not to scratch most surfaces.
- Lemon Juice: The citric acid in lemon juice is a natural descaling agent, similar to vinegar but with a more pleasant scent. You can use undiluted lemon juice for small spots or mix it with water (1:1 ratio) to clean the reservoir and other internal parts. Allow it to sit for a while before scrubbing and rinsing thoroughly. It’s particularly good for leaving a fresh smell.
Using these natural options can be a great way to maintain your dispenser’s cleanliness without resorting to stronger synthetic cleaners, aligning with a more sustainable home cleaning approach.
Troubleshooting Common Water Dispenser Cleaning Issues
Even with the best intentions, you might encounter a few persistent issues during or after cleaning your water dispenser. Here’s how to address them:
- Persistent Odors After Cleaning: If a strange smell lingers, it usually indicates residual cleaning solution or hidden mold. The best approach is to rinse the dispenser multiple times with fresh, clean water, dispensing thoroughly through both taps each time. For a lingering vinegar smell, a final flush with water mixed with a tablespoon of baking soda can help neutralize it, followed by another plain water rinse.
- Stubborn Mineral Stains: For very old or heavy mineral buildup that vinegar alone doesn’t entirely remove, you might need to increase the soaking time, apply undiluted vinegar directly to the stain using a paper towel (letting it sit for a few hours), or consider a specialized descaling product designed for food-contact appliances. Always follow product instructions carefully and rinse extensively.
- Visible Mold or Algae: If you see dark spots or green growth, particularly in damp areas like the drip tray or inside the reservoir, this is mold or algae. While vinegar can inhibit some growth, a diluted bleach solution (1 tablespoon of bleach per gallon of water) is more effective for sanitization. Ensure extreme care with bleach, wear gloves, and rinse even more thoroughly than usual to remove all traces.
- Reduced Water Flow: If, after cleaning, your water flow is still restricted, mineral deposits might be clogging internal tubing or filters. For POU dispensers, check and possibly replace your filter according to the manufacturer’s recommendations. For other types, a professional may be needed to clear internal blockages.
Addressing these issues promptly ensures your water dispenser delivers clean, clear water efficiently.
“Regular maintenance is not just about cleanliness; it’s about preserving the taste and safety of your drinking water, and ultimately, the lifespan of your appliance.”
Conclusion
Keeping your water dispenser free from mineral buildup is a crucial aspect of maintaining a healthy and efficient home. By consistently following a simple routine of descaling with white vinegar, thoroughly cleaning all accessible parts, and rinsing diligently, you can prevent unpleasant tastes, prolong your dispenser’s life, and safeguard your family’s health. Remember, a sparkling clean dispenser is just a few steps away from providing you with refreshingly pure water every day.
What steps will you take this week to ensure your water dispenser is providing the cleanest water possible?
Frequently Asked Questions
How often should I clean my water dispenser to prevent mineral buildup?
Ideally, a deep clean should be performed every three to six months. However, if you have very hard water or notice visible mineral buildup or changes in water taste, more frequent cleaning, perhaps monthly, is recommended. The drip tray and exterior should be wiped down weekly.
Is vinegar safe to use for cleaning water dispensers?
Yes, distilled white vinegar is an excellent and safe choice for descaling mineral buildup in water dispensers. Its natural acidity effectively breaks down calcium and magnesium deposits. Always ensure thorough rinsing to remove any lingering vinegar taste or smell.
Can I use bleach instead of vinegar to clean mineral buildup?
Bleach is primarily a sanitizer and is highly effective at killing bacteria and mold. While it might help with some surface mineral stains, it is not as effective as vinegar for descaling dense mineral buildup. Never mix bleach with vinegar. If using bleach for sanitization, use a very dilute solution (e.g., 1 tablespoon per gallon of water) and rinse extensively.
How can I prevent mineral buildup in my water dispenser?
To minimize mineral buildup, consider using filtered water if possible. Regularly wipe down the spouts and drip tray, and ensure any spilled water is immediately cleaned. Sticking to a consistent cleaning schedule is the most effective preventative measure.
What if my water dispenser still smells after cleaning?
A lingering smell usually indicates residual cleaning solution or hidden mold/bacteria. Flush the system repeatedly with fresh water. For a vinegar smell, try flushing with water mixed with a small amount of baking soda, followed by more plain water. If mold is suspected, a thorough sanitization with a diluted bleach solution (followed by extensive rinsing) may be necessary.